A steel beam is fabricated in a fixed sequence: it is detailed on shop drawings, cut to length, coped and drilled for its connections, fitted with plates and stiffeners, welded, checked, cleaned and primed if specified, then marked and shipped. Each step is set by the drawings, and the welding is done to CSA W59 by a shop certified by the Canadian Welding Bureau (CWB). The result is a beam that bolts or welds into place on site without cutting or drilling in the field.
This post follows one beam through the shop. For what each of these operations adds to the price, see steel beam fabrication cost. For the whole building frame, from columns to bracing, see the structural steel fabrication process.
Step 1: Shop drawings and material
Nothing gets cut until the beam is drawn. The structural drawings give the section (for example a W250x33), the span, the connections and any camber. The shop drawing turns that into a fabrication drawing for that piece: exact length, every hole and its size, every plate, every weld symbol, and a piece mark. The shop drawing is reviewed against the design before fabrication starts. Our post on shop drawings vs fabrication drawings explains the drawing set.
Material is then pulled to the drawing. W-shapes in Canada are commonly certified to both ASTM A992 and CSA G40.21 350W. If the project needs traceability, ask for mill test certificates when you order.
Step 2: Cutting to length and coping
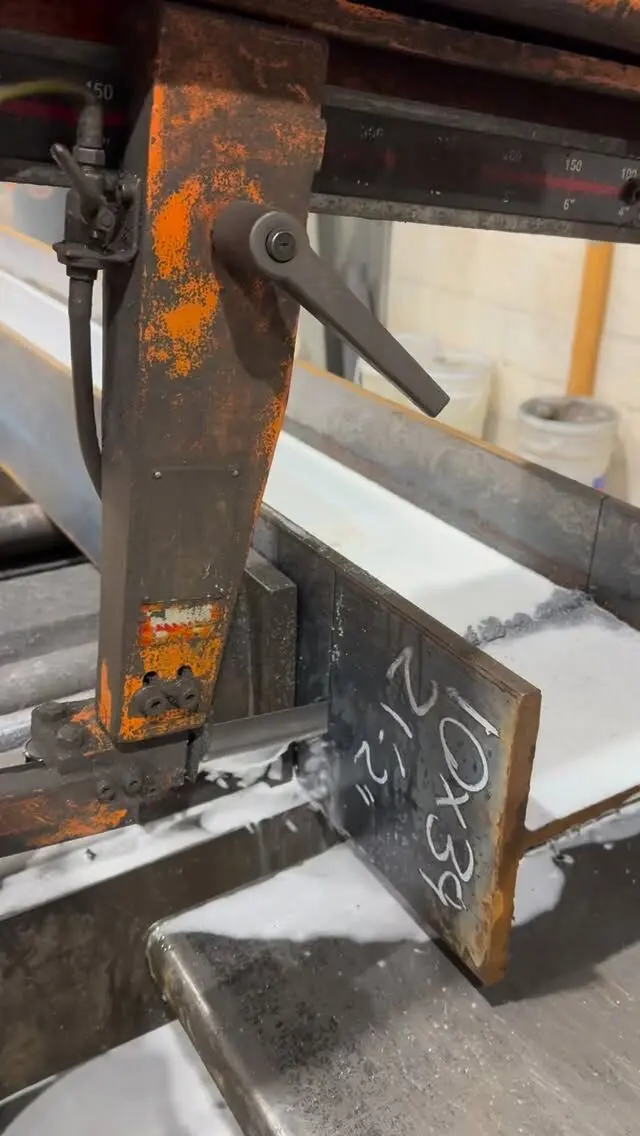
Beams arrive from the mill or service centre in long lengths and are cut to the length on the drawing.
- Square cuts are usually made with a saw, which gives a clean, accurate end.
- Bevelled or mitred ends are used where a beam frames in at an angle or a sloped roof beam bears on a column.
- Copes remove part of the flange and web at the end so the beam can frame into another beam at the same top elevation. A top cope lets the beam's top flange clear the supporting beam's flange. Copes are usually cut thermally, and the corners are rounded rather than left as sharp notches, which can start cracks.
- Blocks and notches trim a flange for clearance around a column or another member.
Cut length matters more than it seems. A beam that is a few millimetres long will not fit between two columns, and one that is short leaves a gap in the bolted connection. CSA S16 sets the shop tolerances for length and straightness.
Step 3: Drilling and punching holes
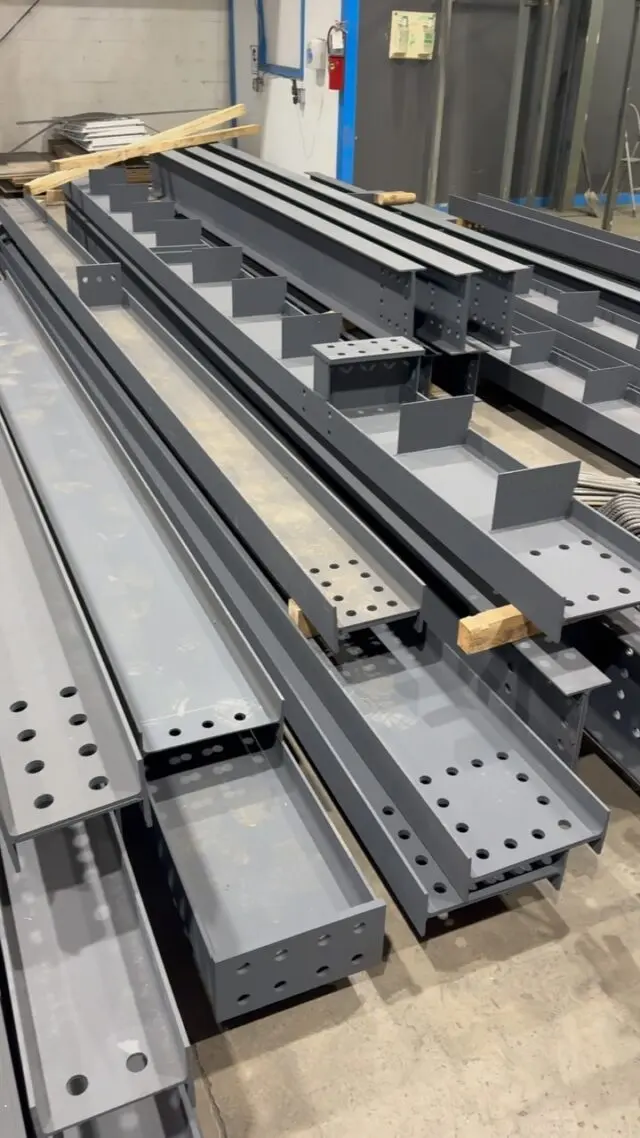
Bolt holes for the connections go in next, in the web, the flanges or both:
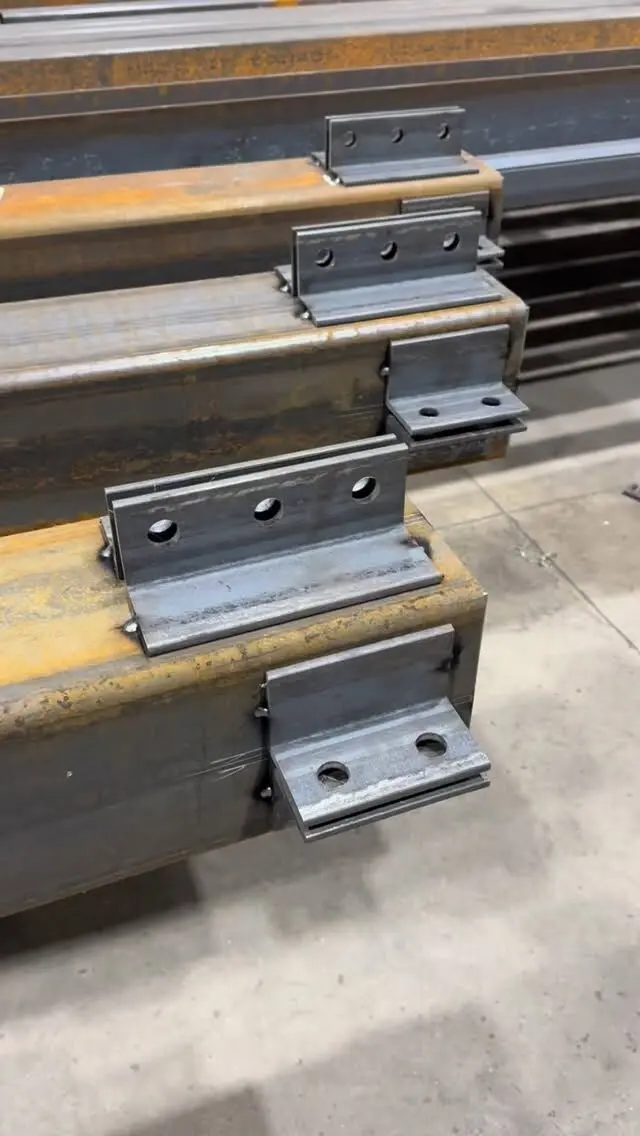
- Connection holes at the ends for clip angles, shear tabs or end plates.
- Flange holes for nailers, wood top plates, deck or framing attachments. In house renovations, holes for a wood nailer along the top flange are a common request.
- Slotted holes where the design allows movement or adjustment.
Holes are drilled or punched depending on the material thickness and the specification. Size and position come from the shop drawing. Holes drilled in the shop are faster and more accurate than holes drilled overhead in a basement, which is why it pays to decide on the attachments before the beam is made. Drilling or notching a beam that is already installed is a different matter and needs the designer's approval.
Step 4: Fitting plates, end plates and stiffeners
Fitting is where a plain beam becomes a fabricated piece. A fitter lays out each attachment from the drawing, clamps it in place and tack welds it, ready for the welder. Common attachments:
- End plates. A plate welded square across the beam end and drilled for bolts, connecting the beam to a column or another beam. End plates need an accurate cut length, because the plate sets the final dimension.
- Shear tabs and clip angles. Single plates or angles at the ends for simple bolted connections.
- Bearing plates. Plates welded under the beam ends where it sits on masonry, concrete or a post, to spread the load.
- Bottom plates. A plate welded along the bottom flange, wider than the flange, can carry masonry, give joists or deck a ledge to bear on, or add strength. It is a structural detail sized by the designer, not an add-on.
- Stiffeners. Plates welded between the flanges at point loads and supports, where the design calls for them.
- Cap and base plates on the posts that carry the beam, usually fabricated at the same time.
Whether a connection is bolted or welded is a design decision. The differences are explained in bolted vs welded steel beam connections.
Step 5: Welding
The fitted beam goes to the welder. In Canada, steel designed to CSA S16 is welded to CSA W59 by companies certified to CSA W47.1 through the CWB Group. In practice that means:
- Welders work from approved welding procedure data sheets that set the process, consumable, joint and position.
- Weld types and sizes come from the drawings. Most attachments use fillet welds; some heavily loaded joints use groove (penetration) welds.
- The welding supervisor makes sure the work follows the procedures, including preheat where the steel and thickness require it.
- Welding sequence is planned to limit distortion. Long welds on one side of a beam can bow it, so welders balance the heat or weld in stages.
Welding in the shop is done in good positions, out of the weather, which is one of the main reasons beams are fabricated before they reach site.
Step 6: Camber, checking and finish
Camber. If the drawings call for camber, the beam is curved slightly upward so it settles closer to level under load. Heat cambering applies controlled heat to the flange to set the curve. Our post on heat vs cold cambering explains the methods.
Checking. Before a beam leaves the welding bay, it is checked against the shop drawing: length, hole positions, plate locations, weld sizes and squareness. Third-party inspection is added when the specification requires it.
Surface preparation and primer. What happens here depends entirely on the specification:
- Steel inside a heated building and hidden by finishes is sometimes left unpainted, if the specification allows.
- Where a shop primer is called for, the beam is cleaned of oil, dirt and loose scale and primed.
- Surfaces to be field welded, and the contact surfaces of certain bolted connections, are often left bare or masked so the coating does not interfere.
- Exterior or exposed steel needs a coating system suited to the environment. We can prime or galvanize to suit the job.
Step 7: Marking, loading and delivery
Each finished beam gets its piece mark, matching the erection drawing, so the crew on site knows exactly where it goes. Beams are then loaded and strapped for transport, with heavy or long pieces loaded in the order they will be lifted. On renovation jobs, length and site access matter as much as weight, so tell us about access when you order.
Remember that the beam size, connections and supports all come from a designer or engineer. Installing a beam in an existing house, especially when removing a bearing wall, normally needs a building permit.
Have your beams fabricated at Procut
We fit, cut, weld, grind, mark and bundle structural steel to your shop drawings, with in-house shop drawings, CWB certified welding and heat cambering of beams. Beams leave our shop with plates, holes and connections ready to install, and we can deliver and install them across the GTA and Ontario.
Send your structural drawings for a free take-off and quote, or see our steel products and services.
Frequently asked questions
How is a steel beam fabricated?
The beam is detailed on shop drawings, cut to length from a mill-length section, coped and drilled for its connections, fitted with plates and stiffeners, welded, checked against the drawing, cleaned and primed if specified, then piece-marked and shipped.
What is an end plate on a steel beam?
An end plate is a steel plate welded square across the end of the beam and drilled for bolts. It bolts the beam to a column or another beam. Its size, thickness, bolts and welds come from the connection design.
Why would a steel beam have a plate on the bottom?
A plate welded under the bottom flange can be designed to carry masonry, give joists or decking a wider bearing ledge, or increase the beam's strength. It is a structural detail, so the size and welds must come from the designer.
Do steel beams have to be welded by a certified shop?
In Canada, structural steel designed to CSA S16 is welded to CSA W59 by companies certified by the Canadian Welding Bureau to CSA W47.1 (or W55.3 for resistance welding).
Are steel beams primed before delivery?
Only if the drawings or specification call for it. Steel hidden inside a heated building is sometimes left unpainted, while exposed or exterior steel needs a coating suited to its environment. Surfaces that will be field welded or bolted in certain connections are often left bare.