Installing a steel lintel in an existing brick wall is structural work done in a set order: assess the wall, size or design the lintel, get a permit, shore the wall, remove the masonry, set the lintel on proper bearing, flash it, and rebuild. Each step involves a different person, from the designer to the building inspector to the mason. This article walks through the process so you know what to expect and who does what. It is not a do-it-yourself guide: opening a loaded masonry wall without the right support can drop brick, floor joists or a roof.
Who does what on a lintel retrofit
Most lintel jobs involve the same cast of people. On a small job some roles are combined, but every role still has to be covered.
| Role | Responsibility |
|---|---|
| Owner or general contractor | Defines the opening, hires the team, coordinates trades |
| Designer or engineer | Checks the wall and loads, sizes the lintel, details shoring and bearing |
| Municipal building department | Reviews the permit application and inspects the work |
| Masonry contractor | Shores the wall, removes and rebuilds brick, sets the lintel, flashes the opening |
| Steel fabricator | Supplies the lintel cut, drilled, welded and finished to the detail |
| Window or door installer | Fits the new unit once the opening is complete |
In Ontario, house designs are typically prepared by a designer with the appropriate Building Code Identification Number (BCIN) qualification, or by an architect or professional engineer. Openings in walls that carry floors, roofs or concentrated loads usually need an engineer.
Step 1: Assess the wall
Before anyone sizes a lintel, someone has to understand what the wall is doing. The key questions:
- Is it veneer or solid masonry? Brick veneer is a single layer of brick tied to a wood or steel frame behind it. It carries its own weight, not the floors. Solid masonry walls (common in older Ontario houses) are two or more layers of brick bonded together, often with header bricks turned end-out every few courses, and they carry floors and roof.
- What sits above the opening? Floor joists, a roof, a beam end, a girder truss or a post landing above the new opening changes everything.
- How far is the opening from corners and other openings? Short piers of brick between openings may not have the strength to take the new bearing.
- What condition is the masonry in? Soft mortar, cracking or existing rust staining should be dealt with in the design.
Step 2: Size or design the lintel
For many openings in brick veneer, the lintel can be sized directly from the 2024 Ontario Building Code, which gives maximum spans for steel angle sizes under 70 mm brick, 90 mm brick and 100 mm stone. Solid masonry walls have their own table that adds interior angles based on the floor load. We explain both tables in steel lintel sizes under the Ontario Building Code.
When the opening is wider than the tables cover, carries concentrated loads, or sits in a wall the tables don't describe, an engineer designs the lintel. The design should state:
- The section size and length
- Bearing length and what it bears on
- Any bolting or welding (for example, paired angles bolted together)
- The finish (primed, galvanized, or both)
- The shoring sequence and when shores can come out
Step 3: Get the permit
Under Ontario's Building Code Act, no one may construct a building without a permit, and "construct" includes material alteration and repair. Cutting a new opening or enlarging one is a structural change, and municipalities such as Toronto list new and enlarged window and door openings among the work that needs a permit. Requirements vary, so call your building department. Our article on permits for load-bearing wall removal in the GTA covers the permit process in more detail.
The permit also brings inspections. Do not close up the work until the inspector has seen what they need to see.
Step 4: Order the lintel
Once the size is settled, order the lintel to the detail: overall length (opening plus bearing at both ends), section, holes, welds and finish. Measure the actual opening on site rather than relying on old drawings. Our guide to ordering custom steel lintels lists everything to send.
Step 5: Shore the wall
Shoring is what keeps the building standing while the masonry is open. The masonry contractor installs temporary support for the wall above the opening and for anything that bears on it, according to the design. On solid masonry walls this often means needling: short beams passed through the wall above the opening and supported on adjustable shores on both sides. On veneer, the frame behind may already be supported by a header, but the brick above still needs to be held.
Shoring has to bear on something solid. A shore set on a soft lawn or an unsupported floor can settle and let the wall drop.
Step 6: Remove the masonry
With the wall supported, the mason cuts out the brick for the opening and for the bearing pockets at each end. Brick is removed course by course rather than by knocking it out, to avoid shaking the wall above. The bearing pockets have to reach sound masonry or concrete.
Step 7: Set the lintel on proper bearing
This is where the details matter:
- Bearing length. Lintels sized from the Ontario Building Code tables need at least 150 mm of bearing at each end.
- Bearing surface. The lintel must have even and level bearing on masonry, concrete or steel. It is bedded and levelled as the design specifies.
- Orientation. An angle lintel goes in with one leg horizontal under the brick and the other leg vertical behind it. On unequal angles, the code tables list the longer leg as the vertical leg, which is what gives the lintel its stiffness.
- Paired angles. In solid masonry walls, interior angles carry the inner wythes. The code table calls for interior and exterior angles to be bolted together on spans over 1,800 mm in the walls it covers.
- Corrosion protection. The lintel must be prime painted or otherwise protected from corrosion. Touch up any damage before it is built in.
Step 8: Flash the opening
A lintel left wet will rust. The 2024 Ontario Building Code requires flashing over the heads of window and door openings in exterior masonry walls unless the opening sits close enough under the eave to be sheltered by the overhang, and where flashing is installed over an opening it must extend from the front edge of the masonry up behind the lintel. Weep holes, spaced no more than 800 mm apart, are required at the bottom of cavities and air spaces in masonry veneer walls, including the space above lintels over openings that need flashing.
Good practice also includes end dams at the ends of the flashing so water runs out through the weeps rather than into the wall at the jambs. Your designer or mason will show these on the detail.
Step 9: Rebuild and remove shoring
The mason rebuilds the brick above the lintel, toothing new courses into the old and matching the mortar as closely as practical. The shores stay in until the new masonry has gained enough strength to work with the lintel, as the design or the engineer directs. Pulling shores too early can crack the new work.
After that, the window or door goes in, the opening is sealed, and interior finishes are repaired.
Safety and timing notes
- Never cut first and support later. Shoring goes in before any brick comes out.
- Watch for hidden loads. Beam pockets, chimneys and roof bearing points are often above openings in older houses.
- Check for services. Wires, gas lines and plumbing can run through or along exterior walls.
- Weather. Mortar needs protection from freezing while it cures, so winter work needs heating and enclosures.
- Inspections. Book them at the stages your permit requires.
What affects installation cost
The lintel is often the smaller part of the job. Wall type, opening width, shoring, access, brick matching, interior repair, engineering and permits drive the rest. We break these down in steel lintel cost in Ontario, with tips for comparing quotes.
Getting the lintel made
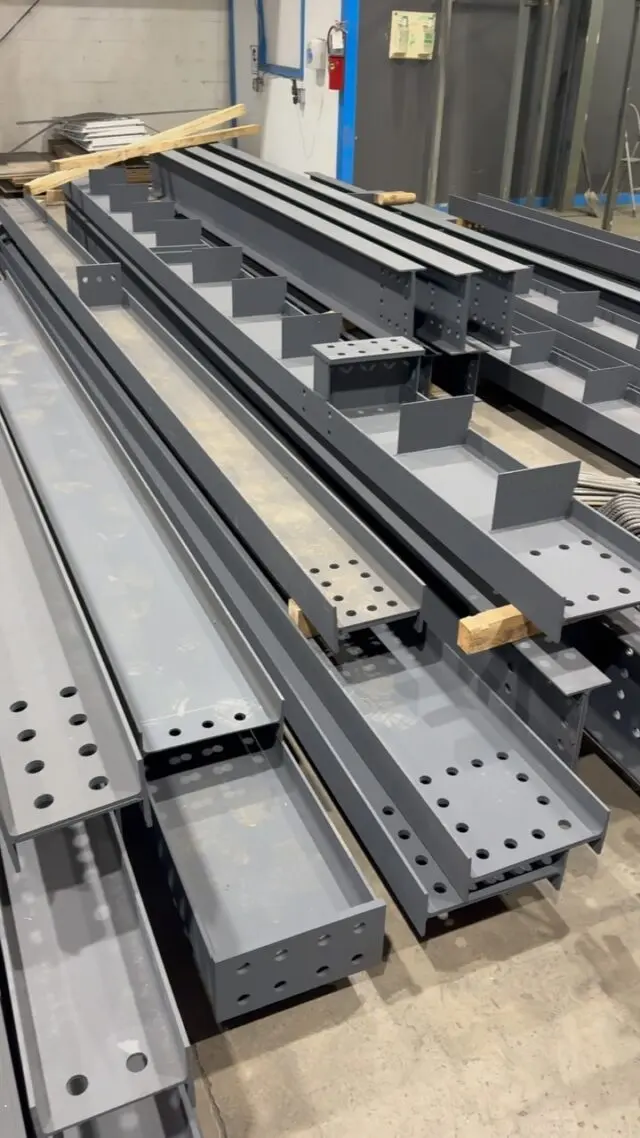
We fabricate steel lintels at our shop in Erin, cut to length and punched, drilled or welded to your detail, with CWB certified shop welding, and deliver across the GTA and Ontario. Engineering services are available for projects that need them. Send your drawings or engineer's detail and we will prepare a quote.
Send your lintel details for a quote, or see our services for fabrication, shop drawings and delivery.
Frequently asked questions
Which way does a steel lintel go?
A steel angle lintel sits with one leg horizontal under the masonry and the other leg standing vertically behind it. On unequal-leg angles, the Ontario Building Code tables list the longer leg as the vertical leg. Always follow the orientation shown on the drawings.
How much bearing does a steel lintel need?
Lintels sized from the 2024 Ontario Building Code tables need at least 150 mm of bearing at each end, with even and level bearing on masonry, concrete or steel. An engineered lintel may call for more.
Do I need a permit to install a lintel in an existing wall?
Creating or enlarging an opening in a wall is structural work, and the Building Code Act requires a permit for construction, which includes material alteration and repair. Check with your municipality's building department before starting.
Can I install a steel lintel myself?
Cutting into a loaded masonry wall can bring down brick, floors or roof if the wall is not properly supported. This work needs a qualified designer or engineer, usually a permit, and an experienced masonry contractor.