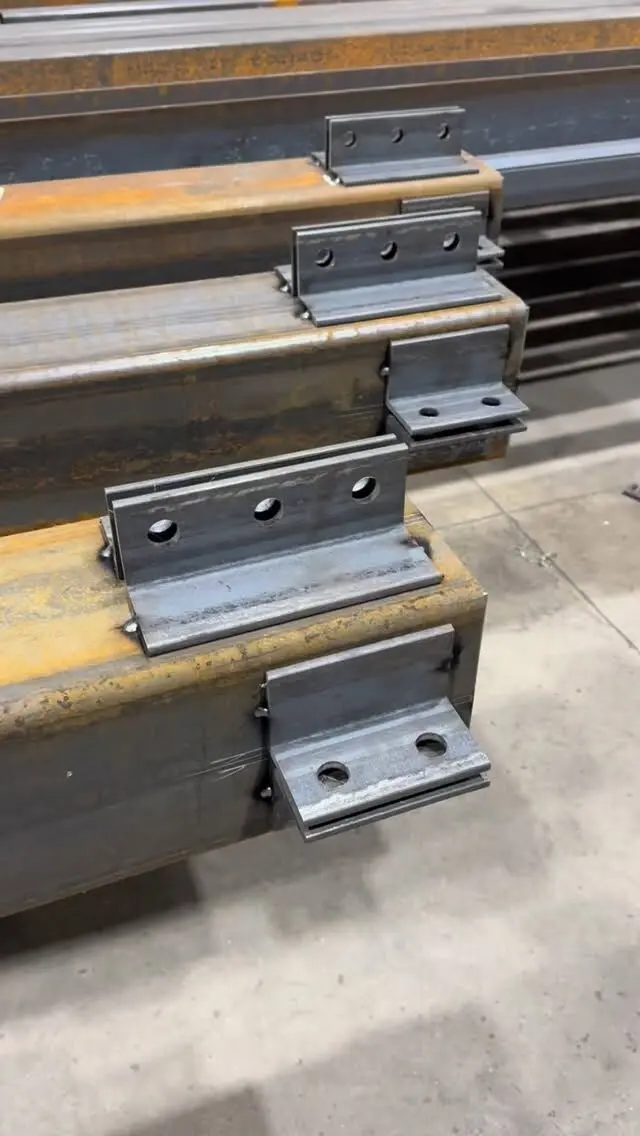
A wood top plate, or nailer, is a length of 38 mm (2x) lumber fastened along the top flange of a steel beam so that floor joists can bear on it and be nailed to it. It is usually as wide as the flange and is attached with bolts through holes drilled in the flange, with powder-actuated pins, or with self-drilling screws made for wood to steel, as the designer specifies. The cleanest way to do it is to have the beam's flange holes drilled in the shop, so the nailer goes on in minutes rather than hours of overhead drilling.
This post covers why the nailer is there, how it changes the beam height, each fastening method, and what to put on the drawing when you order the beam.
Why a steel beam gets a wood top plate
Wood joists and steel don't fasten to each other easily. You can't toe-nail a joist into a steel flange, and joists sitting directly on bare steel can twist, squeak and slide. A nailer solves several problems at once:
- Restraining the joists. Article 9.23.9.3 of the 2024 Ontario Building Code requires the bottoms of floor joists to be restrained from twisting at each end, by toe-nailing to the supports, end-nailing to header joists, or continuous strapping, blocking or cross-bridging near the supports. Over a steel beam, toe-nailing into a wood plate is the simplest way to meet it.
- A fastening surface. Blocking, bridging and the joists themselves can be nailed to the plate.
- Levelling. It's easier to shim a wood plate, or plane it, than to get joists to sit evenly on steel.
- Matching the wood framing. On a basement beam, the plate often keeps the joists at the same relationship to the beam as they have to the sill plate on the foundation wall.
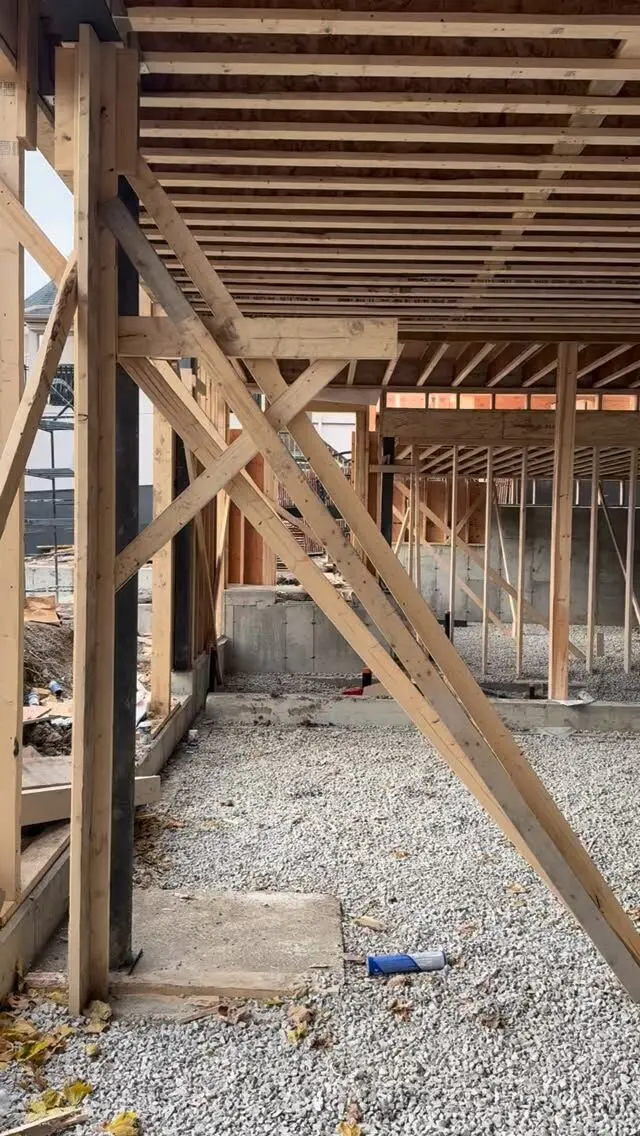
Joists can bear on top of the beam or be framed into its sides. Article 9.23.9.2 permits both. A top plate goes with the first arrangement, the dropped beam, where the beam sits below the joists.
The nailer changes the beam height
Adding a 38 mm plate raises the joists by 38 mm. That sounds obvious, but it is where many basement beam jobs go wrong.
When a beam replaces an existing wood beam, the top of the new nailer has to land at the underside of the existing joists. Work backward:
Top of steel = underside of joists − nailer thickness − any shim allowance
That top-of-steel elevation then sets the post height. If the beam arrives without the nailer accounted for, the posts come out too long or the joists end up jacked high. Measure from a level line, at both ends and at each post, before the beam and posts are cut. Our post on setting a steel beam on wood posts and the guide to replacing a wood basement beam with steel cover the rest of that sequence.
If headroom is tight and the beam needs to be flush with the joists, a top plate isn't the right detail. For joists framed into the side of a steel beam, Sentence 9.23.9.2.(3) requires them to sit on the bottom flange or on 38 x 38 mm lumber bolted to the web with bolts at least 6.3 mm in diameter at no more than 600 mm, with a 38 x 38 mm splice at least 600 mm long over the top and a 12 mm gap above the beam for joist shrinkage. Flush beams also change the lateral support assumptions, so they are usually engineered.
Sizing the plate to the flange
The plate is normally about as wide as the beam's top flange, so the joists bear on the full flange and the fasteners land comfortably inside the wood. Flange widths vary a lot between beams of similar depth:
| Beam | Flange width | Plate that roughly matches |
|---|---|---|
| W200x22, W250x28 (narrow flange) | 102 mm | 38 x 89 mm (2x4) |
| W200x27 | 133 mm | 38 x 140 mm (2x6) |
| W250x33 | 146 mm | 38 x 140 mm (2x6) |
| W200x46 | 203 mm | 38 x 184 mm (2x8) or wider |
Flange widths are from the CISC values in our Canadian W-shape size chart. Lumber sizes are the standard dressed dimensions. Your designer may call for a different width or thickness, for example a double plate or a wider plate to give the joists more bearing.
Joist bearing still has to meet the code: Article 9.23.9.1 requires at least 38 mm of end bearing for floor joists, and joists lapped or butted over the beam need room on the plate for both.
Fastening method 1: bolts through shop-drilled holes
Bolting is the most common and most predictable method:
- Holes are drilled through the top flange, usually staggered on either side of the web so they don't line up across the flange.
- The plate is drilled to match, and bolts pass down through the wood and the flange with a nut and washer on the underside of the flange.
- Counterbore the bolt heads (or use flat-head fasteners) so they sit below the top of the plate and the joists bear flat.
The designer sets the bolt diameter, spacing and edge distances. The decisive practical point is where the holes are drilled. In a fabrication shop, holes are drilled quickly with the beam on the floor, accurately located from the drawing. On site, drilling the same holes overhead into a beam already installed takes a magnetic drill, a stable platform and a lot of time, and holes have a way of drifting from where the designer put them.
Fastening method 2: powder-actuated fasteners
Powder-actuated tools drive hardened pins through the wood and into the steel flange. They are fast and need no pre-drilling, which makes them popular for retrofits where the beam is already up. Things to check first:
- the fastener and tool maker's published limits for steel thickness and strength (a flange that is too thin or too thick for the fastener won't hold properly),
- edge distance from the flange edge and spacing between pins,
- whether the designer has accepted pins for this connection.
Pins are a good fit for nailers that only hold joists in place. Where the plate transfers real load, such as uplift or lateral forces, the designer may want bolts.
Fastening method 3: self-drilling screws
There are self-drilling screws made specifically for fastening wood to steel. They have a drill point to cut through the steel and small wings that ream a clearance hole in the wood, then snap off at the steel so the threads can pull the wood down tight. The catch is the drilling capacity: each screw is rated for a range of steel thickness. A W200x27 flange is 8.4 mm thick, which is beyond the reach of many screws sold for light-gauge framing. Check the screw maker's data against your flange thickness before buying a box, and confirm with the designer.
Welded studs and other details are possible too, but those are specified on engineered drawings case by case.
Holes in the flange and the beam's strength
Any hole removes steel. In a simply supported beam the top flange is in compression, and bolt holes for a nailer are normally a small, accounted-for reduction, but that is the designer's call, not the installer's. A few rules of thumb that hold everywhere:
- Only drill where the drawing shows holes. Don't add holes near the beam ends, near posts or near concentrated loads without asking.
- Don't torch-cut holes. Flame-cut holes are rough and can damage the steel around them.
- Don't notch or cut the flange to clear anything.
Our post on drilling and notching steel beams safely goes further.
Lateral support and the nailer
The steel beam span tables in Part 9 assume a laterally supported top flange. Sentence 9.23.4.3.(3) describes one way to achieve it: wood joists bearing on the top flange at intervals of 600 mm or less, with the load reaching the beam through the joists, and 19 x 38 mm wood strips in contact with the top flange nailed to the bottom of the joists on both sides of the beam. The code's note says other positive methods are acceptable. Whether a bolted nailer on its own counts as lateral support for your beam is a question for the designer, and the answer should be on the drawing. See our steel beam span tables guide for the full conditions.
Ordering a beam ready for its nailer
When you request a quote, include the nailer detail so the holes are drilled before delivery:
- beam size and length,
- hole diameter, spacing, stagger and edge distance on the top flange,
- any holes in the bottom flange for ceiling nailers or boxing,
- cap plate or post connection details,
- primer requirements.
We supply and fabricate wide-flange beams, drilled and fitted with plates to your drawings, and we supply and install basement beams and posts, with delivery across the GTA and Ontario. Shop drawings are prepared in-house, and engineering services are available for projects that need them.
Send your beam detail for a quote, or see our fabrication and installation services.
Frequently asked questions
Why do you put a wood plate on top of a steel beam?
It gives the floor joists something to bear on and be nailed to. Part 9 of the Ontario Building Code requires joist bottoms to be restrained from twisting at their ends, and toe-nailing into a wood plate is the usual way to do it over a steel beam.
How do you attach wood to a steel beam?
The three common methods are bolts through holes drilled in the top flange, powder-actuated fasteners driven into the flange, and self-drilling screws made for fastening wood to steel. The designer specifies the method and spacing; shop-drilled holes with bolts are the most predictable.
What size wood plate goes on a steel beam?
Usually 38 mm (2x) lumber about as wide as the top flange. A W200x27 has a 133 mm flange, which suits a 38 x 140 mm (2x6) plate, while narrow-flange beams around 102 mm suit a 38 x 89 mm (2x4). Your drawings set the size.
Can I drill holes in a steel beam flange myself?
Only where the designer has located them. Holes reduce the flange, and drilling overhead in an installed beam is slow and hard to do accurately. Having the fabricator drill the holes before delivery is faster and keeps them where the drawing puts them.