To lay rebar in a footing, set the bars on concrete block supports or sand-plate chairs at the cover shown on the drawings (75 mm under CSA A23.1 for concrete cast against earth), place the continuous bars first, then the transverse bars, corner bars and dowels, and tie them so nothing moves during the pour. You do not need to tie every crossing: industry practice is a tie at about every fourth or fifth intersection, with every lap, corner and dowel tied. The bar sizes, counts and laps all come from the footing drawings.
Whether a footing needs rebar at all is a separate question. Plain strip footings within Part 9 of the 2024 Ontario Building Code have no rebar requirement, as explained in do footings need rebar. This guide assumes your drawings call for it and explains what the placing work involves, so you know what to expect from your crew and your inspector.
Before any steel goes in
Footings are structural, and the excavation and forms have to be right before the steel can be.
- Bearing surface. Under the Ontario Building Code, excavations for foundations extend to undisturbed soil, and the footing has to be deep enough for frost protection. Remove loose material and standing water before setting supports.
- Forms and lines. Set and brace forms, then mark the footing centreline and the wall lines on the forms. Dowel positions are measured from the wall lines, so this step controls whether the wall steel lines up later.
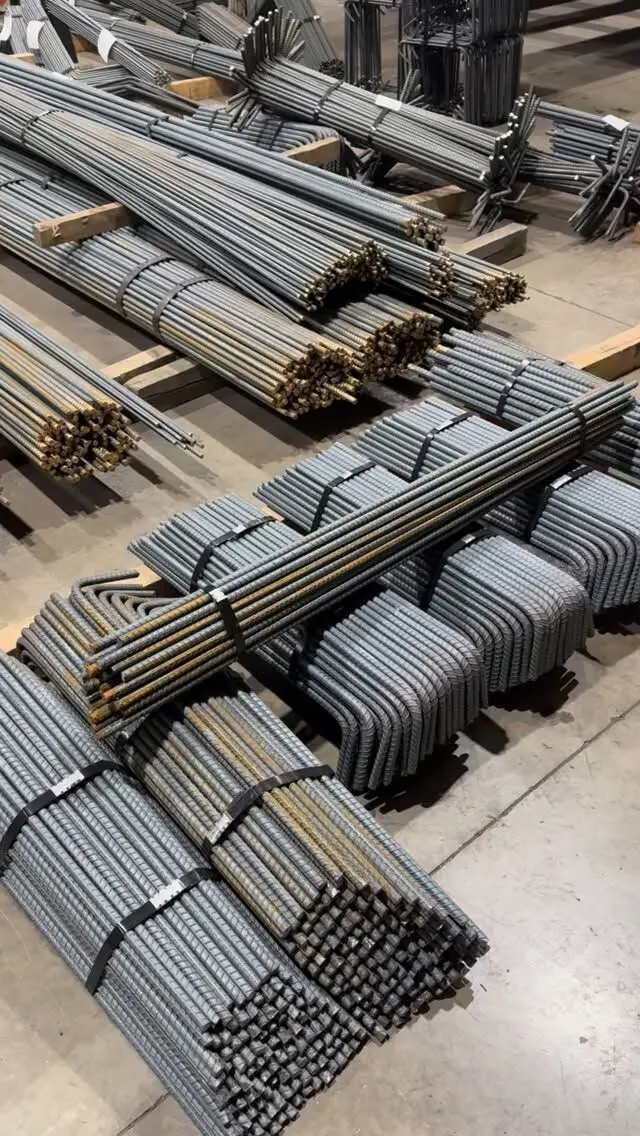
- Steel checked against the drawings. Check bar sizes, counts and bent shapes against the footing plan and details before the delivery is broken open. Tagged bundles sorted by mark save a lot of time here.
- Permit drawings on site. The inspector checks the steel against the approved drawings, so the crew should be placing from the same set.
Supporting the bars at the right height
Footing steel sits near the bottom of the footing, where it does its work, but it must not touch the soil.
Cover. CSA A23.1 sets 75 mm of cover for concrete cast against and permanently exposed to earth, which applies to the bottom of most footings. Formed sides and the top of the footing take the cover shown on the drawings.
Supports that work on soil. Wire chairs with narrow legs sink into the subgrade under load. The usual choices are:
- Precast concrete blocks (dobies), often with a tie wire cast in so the bar can be tied down. The RSIC Manual of Standard Practice describes these as the support class intended for contact with soil and for footings.
- Chairs with sand plates, which spread the load on soft ground.
- Support bars, where the drawings show them.
Do not use bricks, stones, wood offcuts or broken block. They shift, split or leave weak, porous spots in the concrete, and an inspector can reject them. Our post on whether rebar should be off the ground explains why the height matters so much.
How many supports. Enough that the bars do not sag between them and the cage stays put when walked on. Heavier bars span further between supports than light ones. For a typical strip footing with two or three continuous bars, supports are commonly placed in rows across the footing at regular intervals along it.
Laying the bars: the order of work
The usual sequence for a strip footing:
- Place the supports in rows along the footing.
- Lay the continuous (longitudinal) bars on the supports, at the spacing across the footing shown on the section, keeping the side cover.
- Add transverse bars where the drawings show them, usually in wider footings, at the specified spacing. Mark the spacing on the forms and tie to the marks rather than placing by eye.
- Place corner and intersection bars so the steel is continuous around the building. These are usually L-shaped bent bars lapped with the straight bars on each side; see footing rebar laps and corner bars.
- Lap the continuous bars where runs are longer than the bars supplied, at the lap length on the drawings. Stagger laps if the drawings require it.
- Set dowels for the wall above, tied to the footing steel or held by a template at the wall line.
- Check cover all round and adjust any bars that have moved.
Pad footings under columns get a mat of bars each way near the bottom, usually placed one direction first and the other on top as shown on the drawings, with the column dowels tied into the mat. Repeated pads are often built as cages beside the hole and lowered in.
Stepped footings carry the bars through each step with bent bars or laps, as detailed. Do not field-bend bars over a step unless the drawings allow it.
Tying footing rebar
Ties hold the steel in position while the concrete is placed. They do not add strength.
How much to tie. The RSIC Manual of Standard Practice says it is not necessary to tie bars at every intersection, and that a tie at every fourth or fifth intersection is sufficient, with any additional tying clearly specified. In practice, tie:
- every lap splice, at both ends and in the middle on longer laps
- every corner bar and bent bar end
- every dowel, in at least two places so it cannot rotate
- bars to the supports where the support has a tie wire
- enough crossings that the mat can be walked on without bars rolling
Which tie to use. The RSIC manual describes the common hand ties:
| Tie | Typical use |
|---|---|
| Single (snap) tie | Most intersections, to stop bars sliding |
| Saddle tie | Footings and mats, especially to hold bent bar ends in position |
| Wrap and single tie | Wall steel, to stop horizontal bars shifting |
| Wrap and saddle tie | Heavy bars pre-assembled into units that will be lifted |
| Figure-eight tie | Sometimes used in walls in place of the wrap and single tie |
Wire. Black annealed wire, 16 gauge, is the standard unless the engineer specifies otherwise. Coated bar gets coated or plastic ties. Our post on rebar tie wire covers sizes and coatings.
Turn the cut ends of ties inward, away from the forms, so they do not end up in the cover zone.
Dowels into the wall
Dowels are where footing steel most often goes wrong, because they have to land exactly where the wall steel will be.
- Position. Measure from the wall lines, not the footing edge, and check the dowels against the wall section (single layer centred, inside face, or each face).
- Spacing and size. These come from the wall design. Under Part 9, for example, a flat ICF foundation wall counts as laterally supported at the bottom when it is dowelled to the footing with 15M bars at not more than 1.2 m on centre or 10M bars at not more than 600 mm on centre (Article 9.15.4.4).
- Embedment and projection. Hooked dowels usually sit on the bottom mat; the projection has to match the lap with the wall verticals. See footing to wall dowels.
- Set before the pour. Tie dowels in place, or hang them from a template across the forms, before the concrete arrives. Pushing dowels into fresh concrete makes position and embedment hard to control, so check with your designer before planning to do it.
Inspection and the pour
Under the Ontario Building Code, the permit holder has to notify the building department of readiness to construct footings (Division C, Article 1.3.5.1), and that is when the excavation, forms and any steel are normally looked at. On engineered work the engineer or their representative may review the steel as well. Expect them to check bar sizes and counts, laps, cover, supports, dowel positions and that the excavation is clean.
On pour day:
- Keep the steel clean. Mud, loose rust scale and form oil on the bars reduce bond. Light surface rust is normal.
- Protect the cage. Do not drop concrete from height onto the steel or drag the chute through it.
- Watch the dowels. A finisher's boot or a vibrator can knock them out of line. Check them before the concrete sets.
- Cover is not negotiable. The RSIC manual notes that, regardless of placing tolerances, concrete cover should not be reduced by more than one third of the specified cover. If bars have dropped onto the soil, stop and fix them.
Getting footing steel ready to place
Footing steel goes in fastest when it arrives cut, bent and tagged to the footing plan, with corner bars, dowels and pad mats already made. We prepare the take-off and bar list from your drawings, cut and bend 10M to 55M bar in our shop, and deliver across the GTA and Ontario, with phased deliveries to match your pours. Ask us about installation for your project.
Send your footing drawings for a free take-off and quote, or see our rebar products.
Frequently asked questions
How high should rebar be in a footing?
Bars in a footing cast directly against the ground sit on supports that give the cover shown on the drawings, which under CSA A23.1 is 75 mm for concrete cast against and permanently exposed to earth. Precast concrete blocks (dobies) or chairs with sand plates hold them there.
Do you have to tie every intersection in a footing?
No. Industry practice in the RSIC Manual of Standard Practice is that a tie at every fourth or fifth intersection is enough to hold bars in position, unless the engineer specifies more. Laps, corners, dowels and bent bar ends get tied regardless.
What kind of tie is used for footing rebar?
Simple single (snap) ties are used for most intersections. The saddle tie is the usual choice in footings and mats to hold bent bar ends in position, and wrap-and-saddle ties are used where a cage will be lifted as a unit.
Can I lay rebar on the ground and pull it up during the pour?
No. Bars hooked up during the pour rarely end up at the right height or keep their cover underneath. Set them on supports at the specified cover before the concrete arrives.
Can I push footing dowels into wet concrete?
Check with your designer first. Dowels tied in place before the pour are easier to keep at the right position, spacing and embedment, which is why most drawings expect them to be set in advance.